Car paint repair: How to touch up scratches and scuffs on your paintwork
You can do it yourself... but would you want to?
WHETHER IT was your fault or not, a car’s bodywork is rarely free from scratches or scuffs, meaning the need for car paint repair. For minor scrapes, the immediate temptation may be to head down to Halfords and pick up a bottle of T-Cut. If the scar is a little more severe, and you are a bit more confident in your DIY skills, perhaps you might want to order online the right shade of paint, sand down the area and respray it yourself. Especially if you’ve had a rather alarming repair quote from your local bodyshop.
Either option is possible, but will the results be satisfactory if you try to repaint a car’s panel yourself? After one of our own cars was involved in a low-speed scrape, Driving got in touch with ChipsAway to witness the process that specialist roadside repairers go through, and it left no doubt in our mind: leave it to the professionals.
Luke Hall, a ChipsAway franchisee for the Esher area, in Surrey, guides us through the stages.
1 Clean and degrease

It’s imperative that the damaged area is free from dirt, grease and tar, according to Hall. He uses specialist degreasers and cloths and sets up an awning over the car to protect the repair area from the elements. Humidity and temperature affect the quality of the repair.
2 Sand
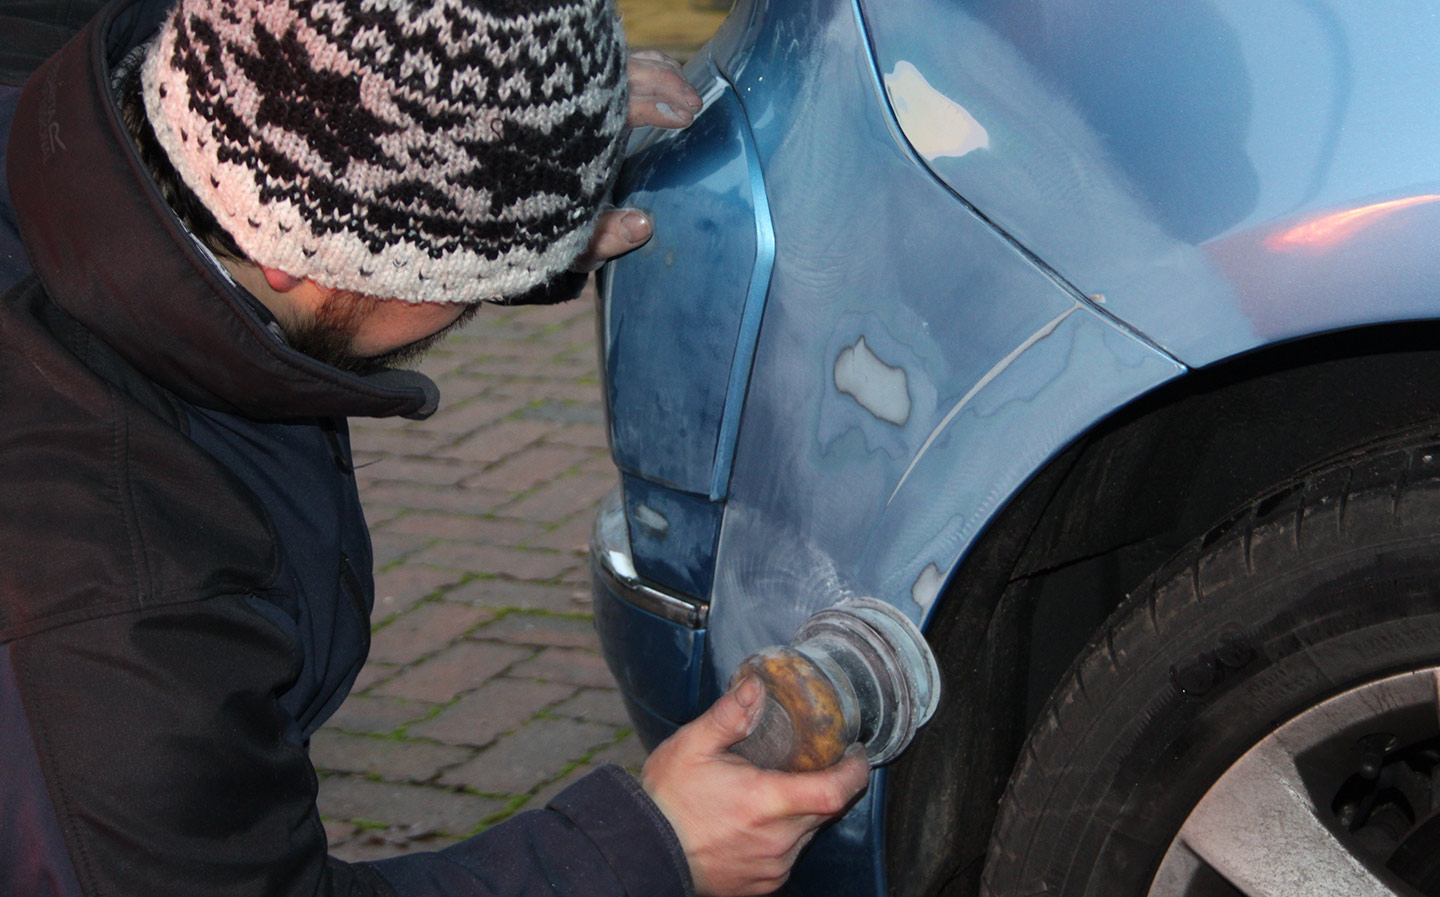
Sanding back the damaged area removes the scratches and ensures that the final repair is smooth. Hall uses both an orbital sander and sands by hand, working from the rough to the smooth grades of paper. He says there’s no standard methodology here: experience dictates the technique and which grades of sandpaper to go for, and it can involve papers anywhere from 40 grit (coarse) to 4,000 grit (ultra-fine).
3 Prime
Hall applied primer to the largest area of repair, but says not all areas necessarily require it. Again, experience dictates. He masked off the area, including the nearest wheel, to avoid primer reaching beyond where it was needed, then applied it with a spray gun in even layers. A first coat was applied, followed by a 10-minute drying period under infrared heat lamps, followed by a second coat.
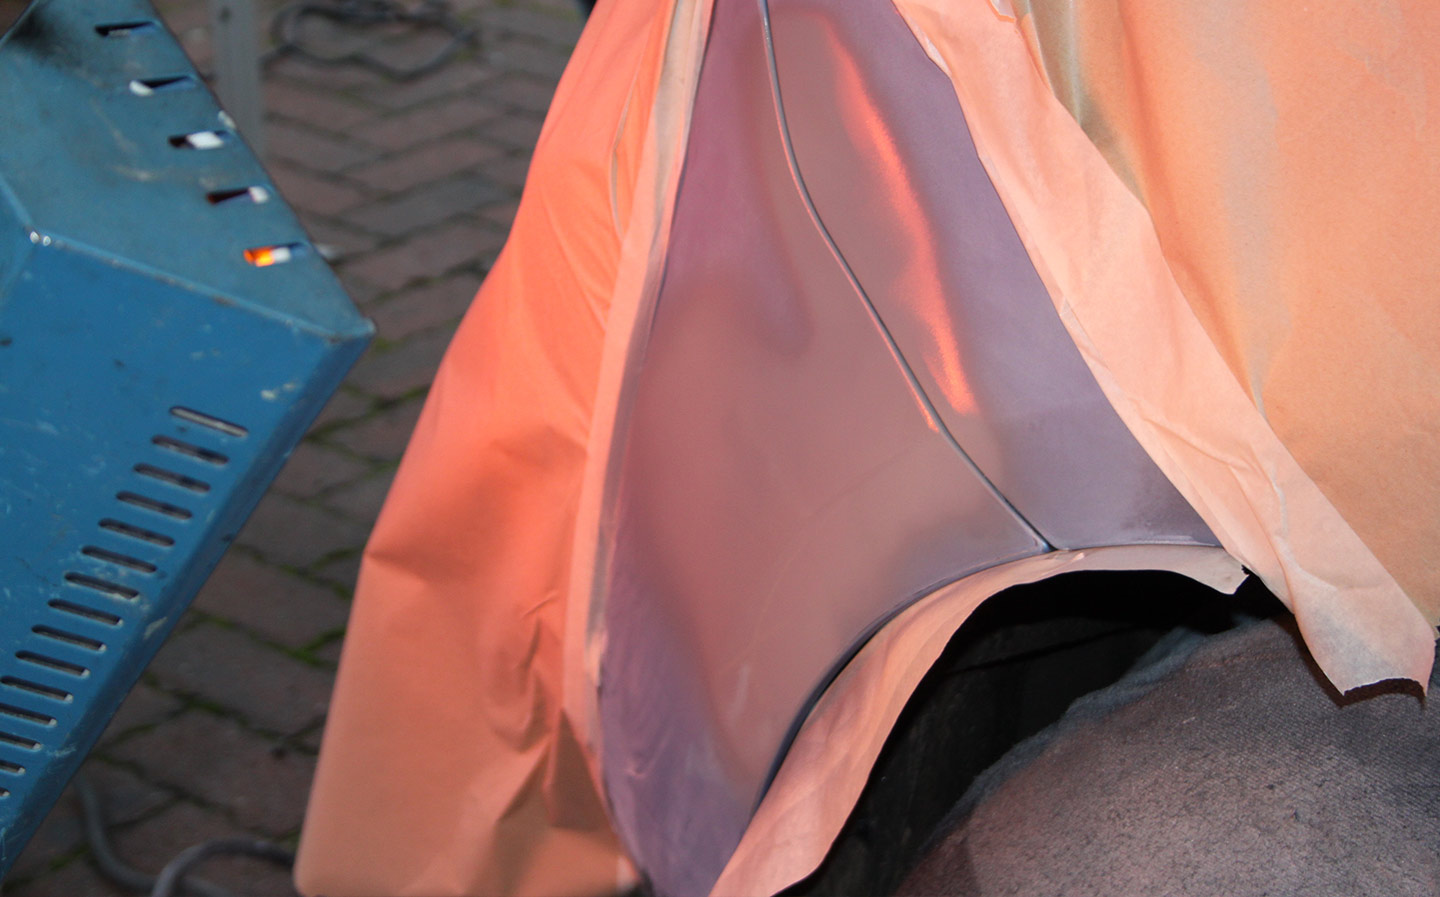
Hall then added a guide coat of dark paint and used fine sand paper to remove “highs and lows”, then cleaned the area again with degreaser and used an air gun to blast away dust and dry the area.
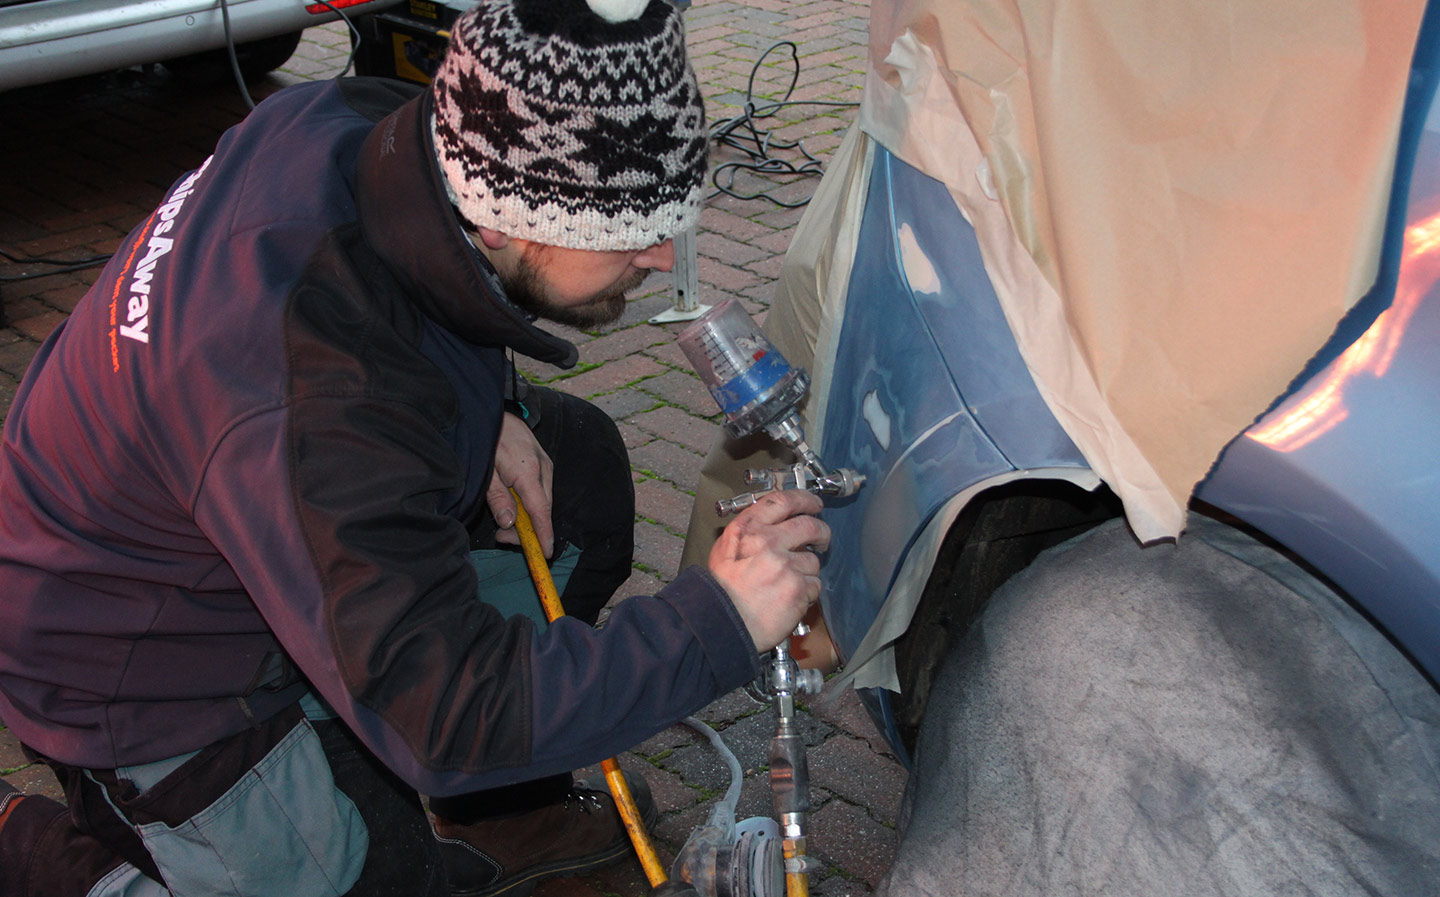
4 Paint
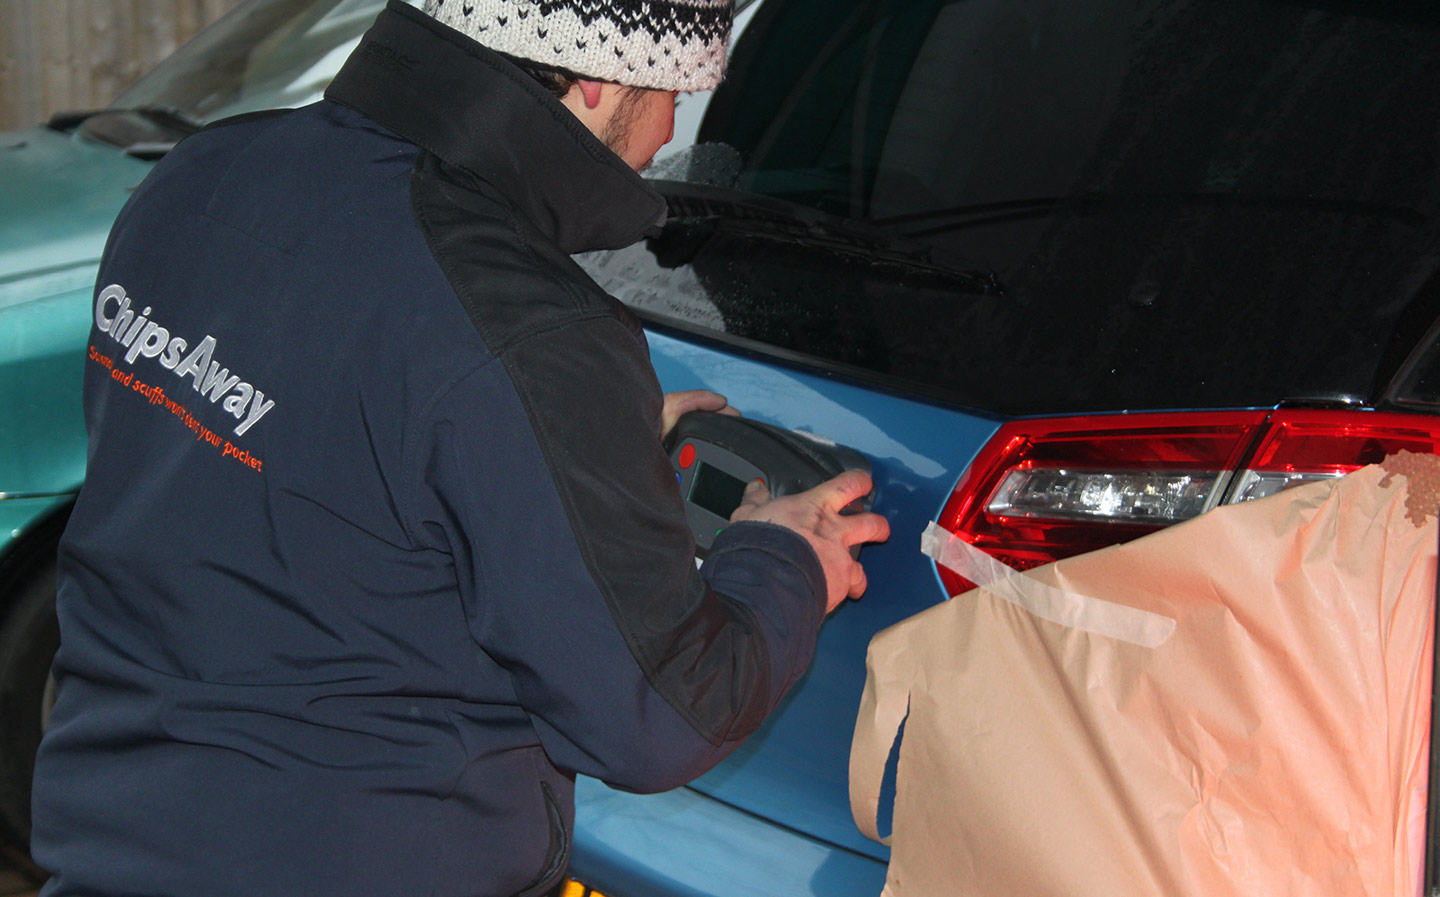
The shade of paint is very important, of course. Hall had inspected the damage in an earlier visit (this is standard for ChipsAway, as they need to assess the damage and provide a quotation, and it ensures they can work in a given space and have access to an electrical socket) and so had brought the correct paint, but he used a spectrometer to measure the exact shade at three points around the damaged area. He then uploaded this information to a laptop in his van and mixed the paint to match the natural colour of the panels.
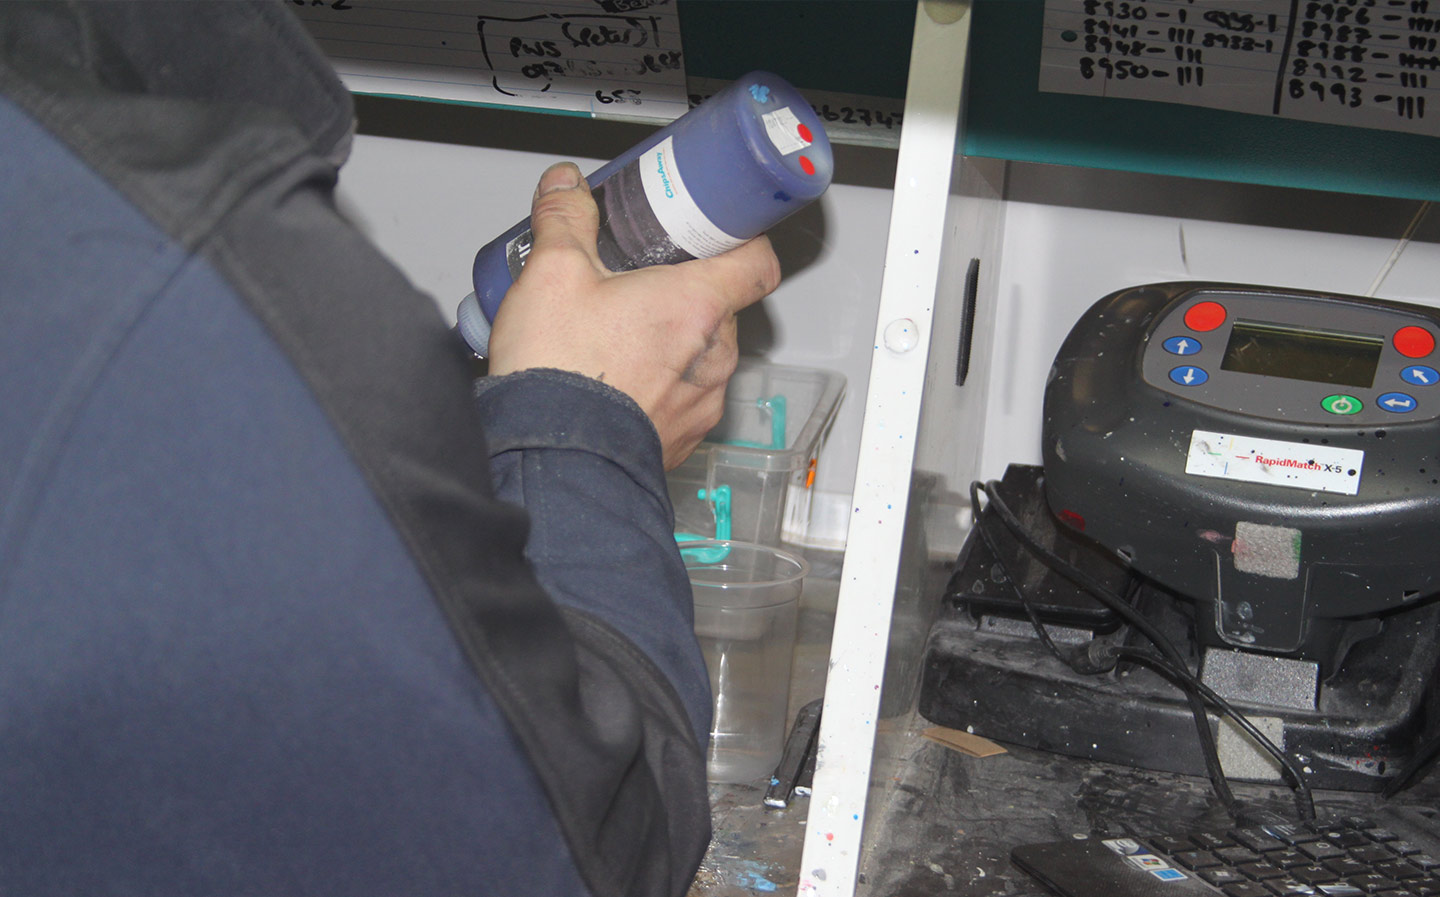
This is clearly a highly specialised process that ensures a top quality finish.
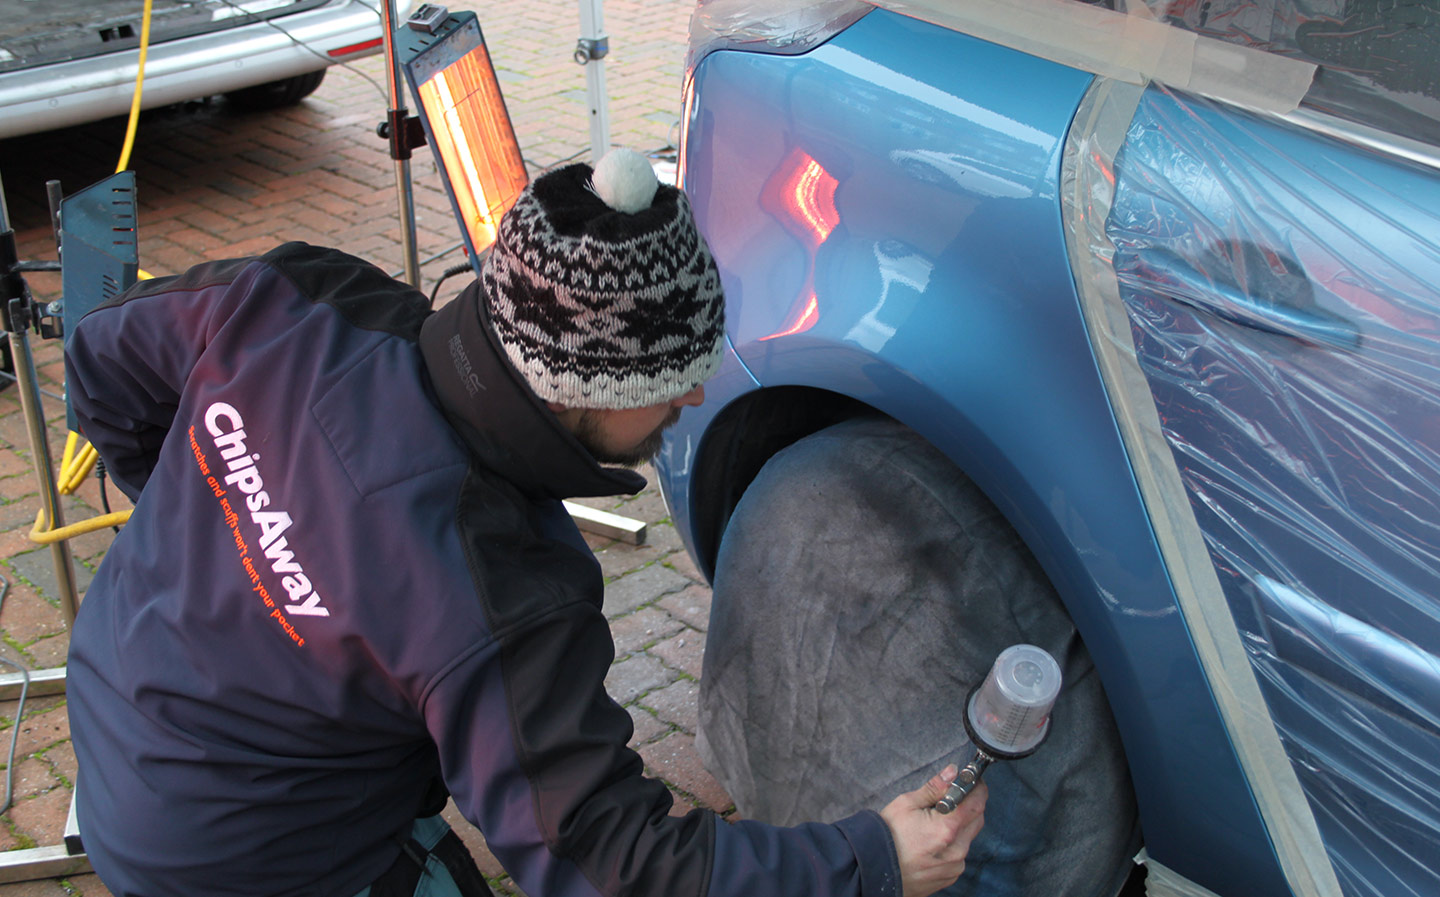
Assuming you can find the correct shade, or at least the nearest off-the-shelf product, next spend some time on preparation. Hall taped off the nearby body panels and lights, as well as a chrome section on the bumper. He then covered the side and rear of the car in a layer of thin plastic film that clung to the body and secured the edges with masking tape. Using a scalpel, he carefully cut away the plastic around the panel to be repaired and used more masking tape to secure the inside edges.

Paint was applied with a spray gun, feathering the edges to ensure the finish is smooth across the whole panel. The water-based paint he used needed just three minutes curing time between coats under the lamps. The heat from the lamps is very important, according to Hall, and damp or humid environments can greatly affect the quality of the finish.
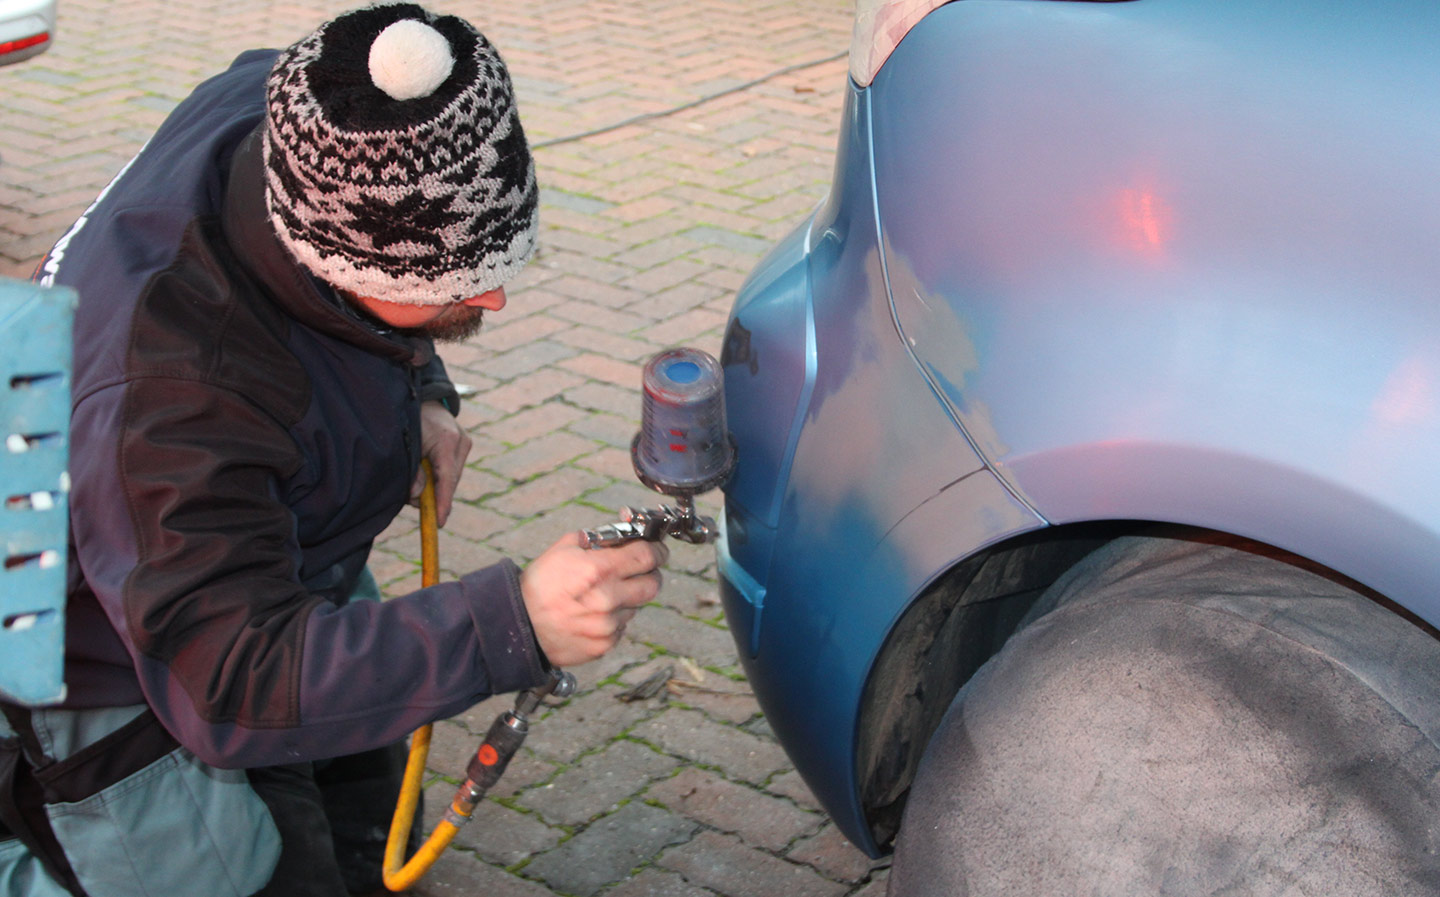
A total of five coats was required for our repair, but this varies depending on the car and the repair.
5 Lacquer
Lacquer provides a tough, durable glossy finish to the paint. This was sprayed on and allowed to dry over 15 minutes before a final coat was applied.
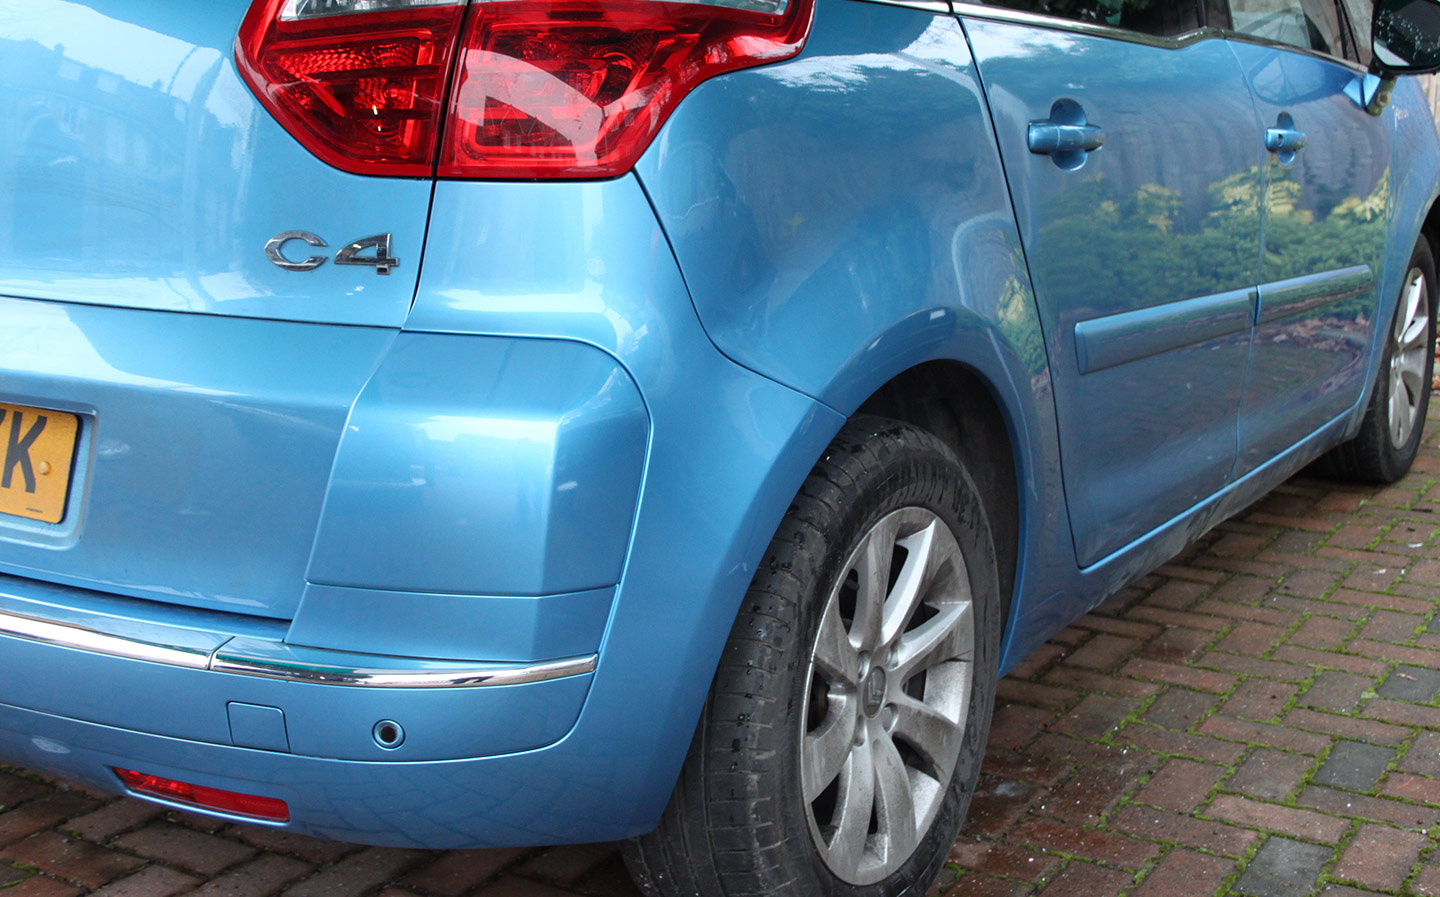
6 Polish

The final job is to polish the area. Hall used an orbital machine polisher with two grades of 3M pad to add and buff the polish. He recommends that the car isn’t washed for at least three days, preferably a week, but after that can be cleaned as normal.
Should you attempt a DIY car scratch repair?
If you feel your skills are up to it, even Luke says that it’s entirely possible using inexpensive products from Halfords or other retailers. It can potentially save a lot of money compared to using a professional service. There are obvious caveats as regards the effect on your car and its resale value if it goes awry, so tread lightly.
How much does it cost to repair and paint a car?
Though it obviously depends on the amount of work that needs to be done, professional repairs for small scratches and dents start from around £150 to £200. More extensive work, for example if the damage extends across multiple panels, can end up costing £500 and above. Like everything, it’s worth shopping around as dealers can be far more expensive than paint repair specialists. If a business can’t give you a cost estimate for the repair in advance, walk away.
Again, for those repairing scratches at home the cost will depend on the extent of the damage and how deep the scratch is. Light scuffs will require different products and treatments to deeper gouges. Either way, however, DIY paint repair won’t cost more than £25 to £30 unless you’re tackling some major repairs.
What equipment will I need for car scratch repairs?
For light scrapes where just the lacquer is affected, a product such as T-Cut or Autoglym Paint Renovator, both of which are very lightly abrasive, can help blend out the scratch by “cutting” the topcoat of paint. Users will need clean, lint-free cloths to apply the cutting compound as well as wax to be applied afterwards to protect the paint now that the topcoat has been partially removed.
For more serious scuffs, a rust preventer may be required as well as a touch-up pen matched to your car’s paint code, which is usually found on the VIN plate. Wax is needed to provide the paint with additional protection after the repair. Retailers such as Halfords will often stock kits containing everything a DIYer will need to repair light body damage.
If you’re thinking of taking on even more extensive damage, you’ll need various grades of sandpaper (to the extremely fine), primer and a spray can of paint in your car’s colour. An electric sander can save time, though be careful as you can end up overdoing the sanding and making the problem worse. And as recommended by Chips Away, an electric heater will dramatically improve the quality of the finish.
Before any spraying, you’ll need newspaper or plastic sheeting and masking tape, too, so the paint doesn’t overspray onto other panels and windows. Depending on the type of paint, you may also additionally need a spray can of lacquer to provide a protective topcoat. As ever, once the paint is fully dry, a layer of wax provides extra protection.
How do you fix car scratches yourself?
This depends on the type of scratch. By running your fingernail over the scrape you can tell whether it’s just a nick in the topcoat or something deeper. Let’s take a look at the two main types of scratch that can be fixed at home.
Light scratches in the topcoat
- Wash your car — the area needs to be clean and grease-free.
- Dab a pound-sized amount of cutting compound onto a clean cloth and work it into the scratch.
- Wipe away any remaining residue.
- If the scratch is still there, you can repeat the process two or three times, but no more.
- If the scrape isn’t gone after a couple of rounds, it may be deeper than just the topcoat.
Deeper scratches
- Clean the affected area.
- Apply a cutting compound to the scratch and surrounding area in a circular motion.
- Clean the area again, removing any excess compound.
- Apply touch-up paint using a touch-up pen, fine paint brush or a spray can. If you’re spraying, be sure to mask off the surrounding area to avoid overspray.
- Once dry, apply thin layers of clear-coat to protect the paint. Build up the layers gradually.
- Flatten the area using either fine sandpaper — 2,500 grit or higher — or an appropriate cutting compound. If using the latter, work it in a circular motion. You’re trying to get the repair to match the area around it.
- Once clean and dry, apply a layer of wax to the paint.
Can toothpaste really fix car scratches?
There is some veracity to the old hack of using toothpaste to fix scratches as it contains lightly abrasive particles like many cutting compounds. Those particles aren’t big enough to create any major impact, so it’s ineffective on all but the very lightest scuffs in the topcoat, such as from bushes or tree branches on country lanes. A cutting compound designed for paintwork is a far better bet, though, and toothpaste will do nothing for a repair like the one we needed.
How do I repair bumper scuffs?
Repairing scuffs to body-coloured bumpers follows the same principle as paint anywhere else on the car. Jobs involving spraying are best done in well-ventilated indoors areas such a garage to avoid environmental interference like dust, rain and extremes of heat. While most would leave a job of this scale to a professional, if you’re a handy sort, then it can be done at home.
Just a reminder of a more involved repair:
- Clean and mask the area.
- Sand and again clean the damaged area. If it’s a minor scuff, use plenty of cutting compound. If it needs more substantial work, go straight for the heavy sandpaper.
- Apply filler to fill in any significant depressions in the paint or bodywork.
- Once fully dry, sand the filler back so it’s the same shape and level as the rest of the surrounding paintwork.
- Very lightly rough up the filled area to give the paint a good surface to cling to.
- Apply up to three coats of primer, leaving sufficient time for each layer to dry. Heat lamps are important here if you want a professional finish. Allow extra time for the final coat to dry.
- Sand and key the primer to a smooth finish.
- Assuming the use of a spray can rather than a gun, begin applying the paint in smooth, even layers until the primer is no longer visible.
- Blend the paint with the surrounding areas and use a heat lamp again to dry the layers.
- Apply two to three protective coats of lacquer to give the paint both durability and a high gloss.
- Once the lacquer is dry, sand out any imperfections using fine sandpaper.
- Buff the area using the appropriate grades of polishing compound.
- When you’re satisfied that the repair looks as good as can be, remove the masking.
- As per Luke’s advice above, leave it for about three days until you wash and wax the area you’ve just repaired.
While that may sound like a lot of work, most bumper scratches can be dealt with using the other methods we’ve outlined above. If you think any of these repairs are beyond your skill set, it’s really worth having them professionally looked at, as not only will a botched DIY job look terrible but it can also seriously affect the resale value of your car.
For more examples of Hall’s repair work, visit facebook.com/chipsawayesher.
Tweet to @ST_Driving Follow @ST_Driving
- If you enjoyed this advice page on how to repair scratched paintwork on your car, you might also be interested in this guide to repairing alloy wheel damage
- We also have this guide to glass cleaners and glass sealant
- And if you’re a budding mechanic, check out these Haynes guides to car maintenance, from changing batteries to replacing brake pads