Haynes How-To: change front brake pads
Slowly does it
Sections
- Spare a thought for your car’s brake pads
- How brake pads work
- Why you should change your car’s brake pads
- When to replace brake pads
- Step-by-step guide to replacing a car’s front brake pads
Spare a thought for your car’s brake pads
Drivers rarely give much thought to their car’s braking system. Yet it is one of the most important safety features of any car.
Whether slowing in stop-start commuter traffic or using brakes to their maximum potential, when driving at a track day, who doesn’t take them for granted?
It’s only when the local garage mechanic advises that parts need replacing, or worse still, a red warning light illuminates on the dashboard, that we will stop and ponder the braking system. And that’s also when the cost of having parts replaced, such as the brake pads, comes into sharp focus.
However, changing brake pads is a relatively simple job that anyone with a modest ability for DIY should be able to safely accomplish. And if you already own most of the basic tools needed to perform the job, it will save you a few bob in garage costs and give a glowing sense of satisfaction, too. Here, the experts from Haynes explain how to do it.
How brake pads work
Brake pads are designed to work with a car’s brake discs, or rotors, to slow it down. They are installed in brake callipers and are pushed against the discs by pistons, which are in turn moved by brake fluid that is pressurised by a master cylinder.
When a driver pushes the brake pedal, the master cylinder compresses the fluid which in turn moves the pistons to ease the pads against the discs.
Some cars have brake pad wear indicators, which illuminate a light on the dashboard when the pads have worn down to a set limit. Most pads don’t, though, so the only way of telling how worn a pad is is to examine the level of fluid in the brake fluid reservoir (which drops as the pad wears) or to take the wheel off and inspect the material remaining on the pad.
Why you should change your car’s brake pads
Brake pads are critical components for the safe operation of your car, and should be maintained correctly to avoid a potential disaster. If the pads wear down completely you’ll not only damage the discs, which are expensive to replace, but may be unable to stop the car in time and cause a crash.
Each wheel has at least two pads and it’s important to change the pads on both front wheels at the same time, to ensure an even brake force across the pair of wheels.
At the same time you should examine the condition of the discs and look for signs of wear, or more serious scoring or corrosion, and have them replaced if needed.
When to change your brake pads
It’s important that your front brake pads are examined whenever the car is serviced and replaced when necessary. Modern cars typically require an annual inspection, or 18 months for longer service intervals.
If you hear unpleasant squealing when using the brakes, all may not be well with the pads. It is most likely caused by a small metal shim that is designed to make contact with the brake disc as the pad reaches the end of its serviceable life, warning the driver that it’s time to replace the pads.
Equally, if the car is pulling to one side of the road noticeably, when braking in a straight line on a flat, level road surface without camber, all may not be well with the brakes.
Brake pads may also have a sensor that activates a dashboard warning light when the pad has worn down, but not all models have these. So open the bonnet and inspect the level of the brake fluid in the reservoir. It drops as the pads wear, so can be a useful indicator of when pads need replacing.
Next, jack up the front of the car — see our guide on how to safely to this — remove the front wheels and examine the pads directly.
If there is less than 3mm of pad depth remaining, it’s time to change them.
All cars are slightly different, so you should consult the vehicle handbook, or use a Haynes manual for the relevant make and model.
Step-by-step guide to changing a car’s front brake pads
Tools you will need (click to view at Halfords.com)
- Brake system cleaner aerosol
- Wire brush
- Floor jack
- Screwdriver with flat head
- Allen key set
- C-clamp
- Socket set
- Torque wrench
- Ruler
- Pliers
- Gloves
You may also need
- Brake pads (Enter vehicle registration number to find correct part, or order from a franchised dealer)
- Copper grease
Below is an example video but look for a full step-by-step guide for your specific car at Haynes OnDemand, here.
A quick guide to changing a car’s front brake pads
- Make sure the brakes are cold and that you have the correct tools for the job
- Raise the car on a jack then support the car on jackstands
- Remove the wheel
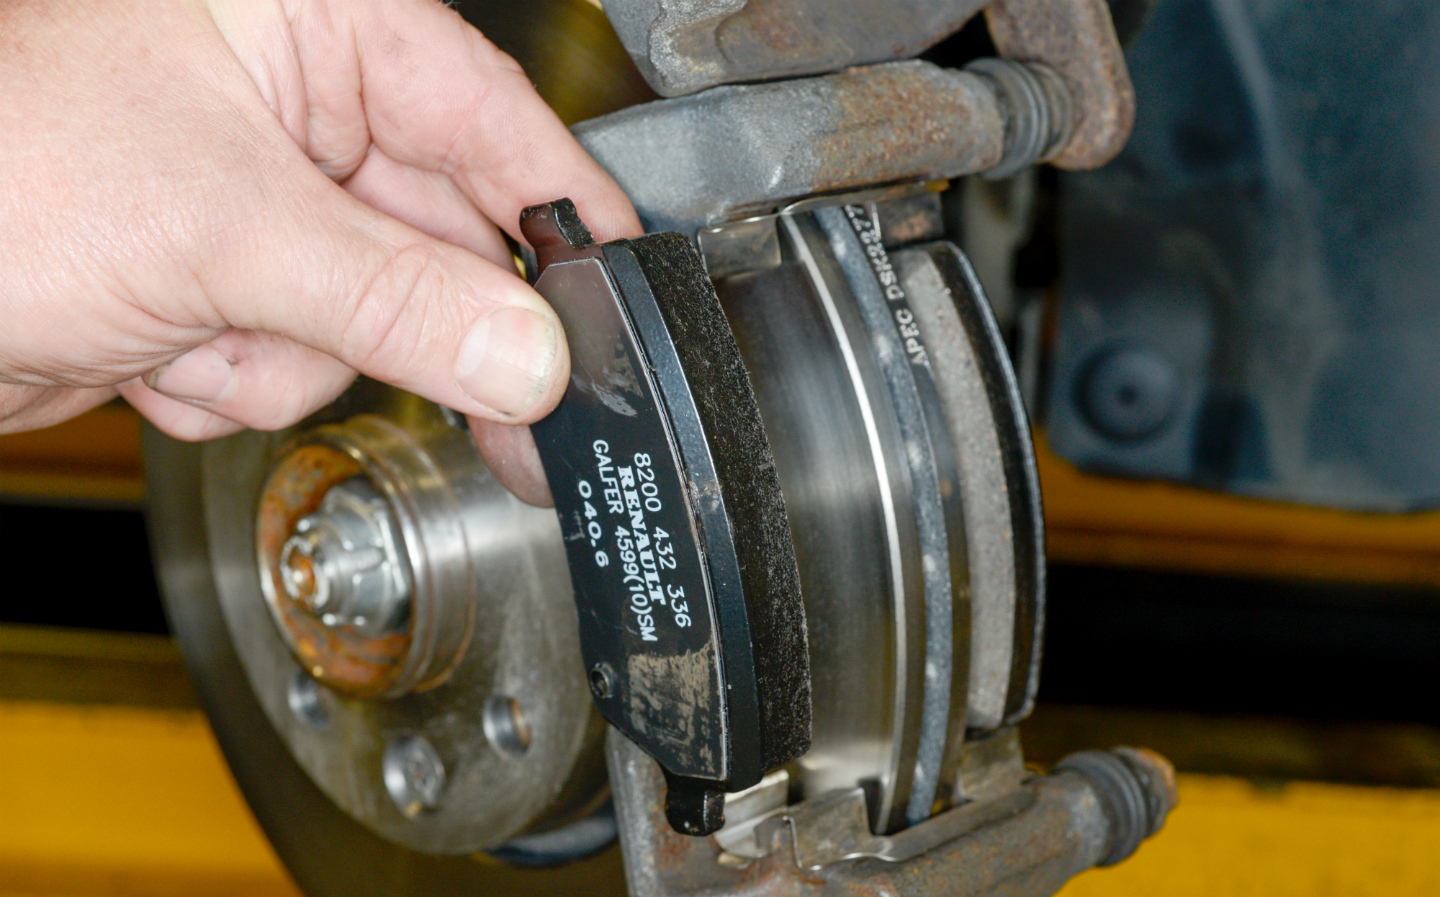
- Clean the brakes using the degreaser and remove the caliper
- Remove the pads from the caliper and examine the disc and brake line(s)
- Insert the new pads and replace the caliper and any necessary clips
- Check the brake fluid level
- Refit the wheel
- Jack up the car, remove the axle stands and lower
- Use the torque wrench to tighten the wheel nuts